Introduction
Shuttle's Twilio integration allows you to accept payments over the phone using Twilio's Pay capabilities. This enables secure payment collection through DTMF (touch-tone) input during phone calls, supporting both credit card and ACH payments.
Integration Methods
Twilio Pay supports two integration patterns depending on your use case:
| Method | Use Case | API |
|---|---|---|
| IVR (Self-Service) | Automated payment collection in IVR flows | <Pay> TwiML verb |
| Agent Assist | Agent-controlled payments in contact centers | Payments Subresource API |
IVR Integration
Use the <Pay> TwiML verb for fully automated payment collection. The customer interacts directly with voice prompts without agent involvement. Best for:
- Self-service bill pay
- Automated payment reminders
- After-hours payment collection
Agent Assist Integration
Use the Payments Subresource API when agents need to guide customers through payment collection. The agent controls the flow through a custom UI while Twilio securely captures the card data. Best for:
- Contact center payments
- Complex transactions requiring agent assistance
- Sales calls with payment collection
Overview
The Twilio Pay Connector integration provides:
- DTMF Payment Collection: Accept credit card and ACH payments through phone keypad input
- PCI Compliance: Secure payment handling without storing sensitive card data
- Multiple Payment Methods: Support for credit cards and ACH bank transfers
- Recurring Payments: Set up scheduled and recurring payment plans
- Tokenization: Save payment methods for future use
- Real-time Processing: Immediate payment confirmation during calls
Getting Started
Step 1: Install the Pay Connector
To start accepting payments through Twilio, you'll need to install the Shuttle Pay Connector in your Twilio account.
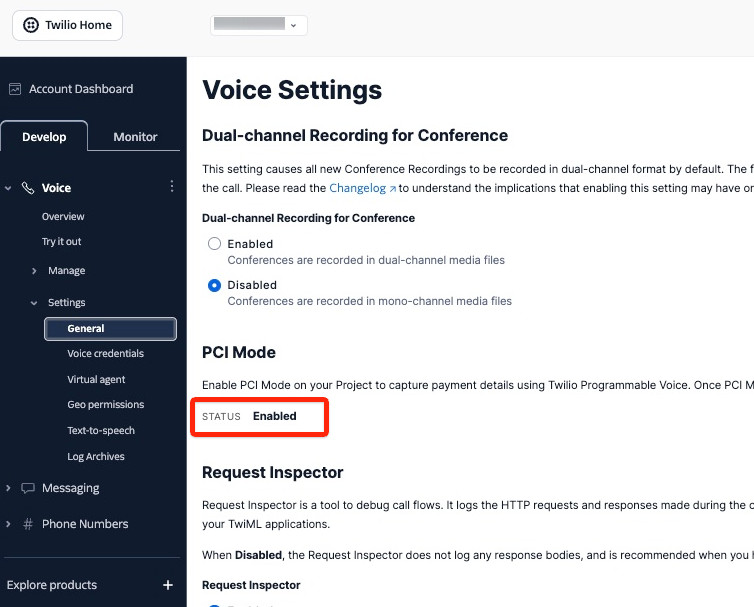
Enable PCI Mode
- Log into your Twilio account
- Navigate to Voice Settings
- Click "Enable PCI Mode"
- Accept the Terms and Conditions
- Save your settings

Install Shuttle Pay Connector
- In Twilio Console, enter
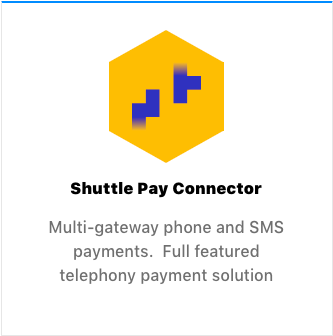
<Pay> Connectorsin the "Jump to" search box, or click here - Select the "Shuttle Pay Connector" from the catalog

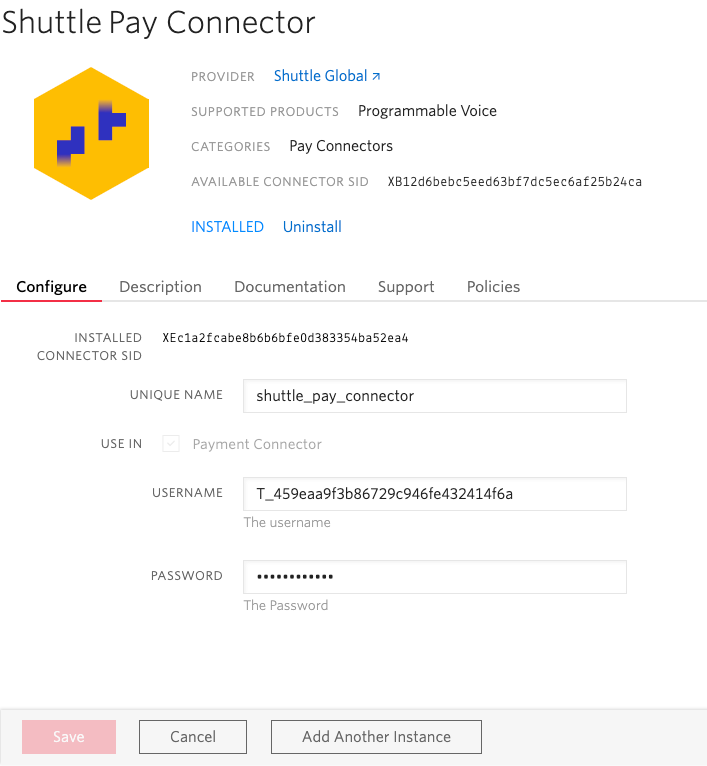
- Configure the connector with these settings:
- Unique Name:
shuttle-pay-connector(or similar - note this for later use) - Username: Your Shuttle instance key
- Password: Your Shuttle secret key
- Unique Name:

Tip: Take note of the "Unique Name" as you'll need it when implementing the
<Pay>verb in your TwiML.
Step 2: Test Your Configuration
We've created a demo application to help you test your Twilio integration quickly.
Using the Demo App
-
Map a Twilio phone number to our demo webhook URL:
https://[your-host]/demo/shuttle-pay-connector/[instance_key]/[secret_key]/startReplace
/shuttle-pay-connector/with your unique connector name from Step 1. -
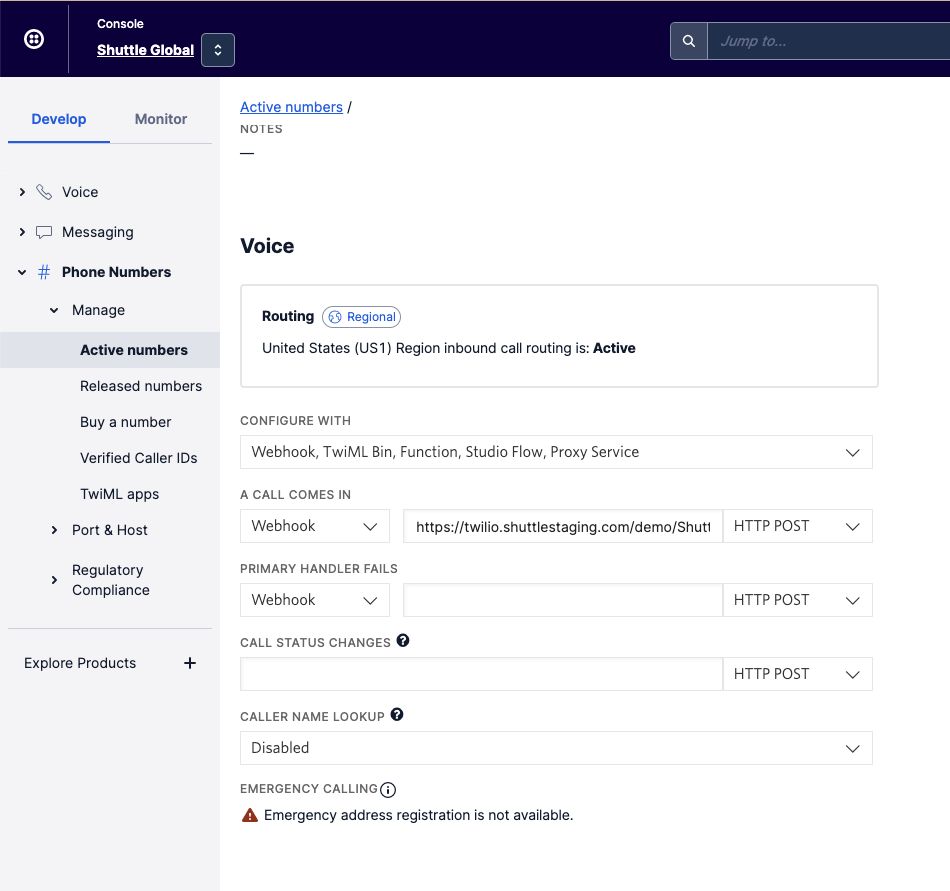
Configure your phone number:
- Go to Phone Numbers > Manage > Active Numbers in Twilio Console, or click here
- Set "Voice" > "A Call Comes In" to "Webhook"
- Enter the demo URL and set method to HTTP POST
- Save the configuration
-
Call your configured number and follow the prompts to make a test payment!

Resources: View the demo app source code or watch the walkthrough video.
Next Steps
Once you've verified your setup with the demo app, choose your integration method:
IVR Integration Guide - For automated self-service payments:
- Implement the
<Pay>verb in your TwiML - Handle payment responses and errors
Agent Assist Integration Guide - For contact center payments:
- Build a custom payment widget for agents
- Use the Payments Subresource API
Shuttle Pay Connector Reference - Detailed reference for both methods:
- Request parameters and response fields
- Status values and decline types
- Webhooks and API operations
Updated 28 days ago