Getting Started
To set up payment links, visit the link below:
During account creation, you can create an account in "live" mode or in "sandbox" mode for testing. In Sandbox, the behavior of the application is exactly the same. However, no money will be moved, and a "You are in Sandbox mode" banner will be shown across the top of the payment link page.
Tip! Shuttle allows you to set up multiple different organizations and within each organization to have multiple different accounts connected to different payment processors. Typically, you would have one organization and one account for your business.
Connecting a Payment Processor
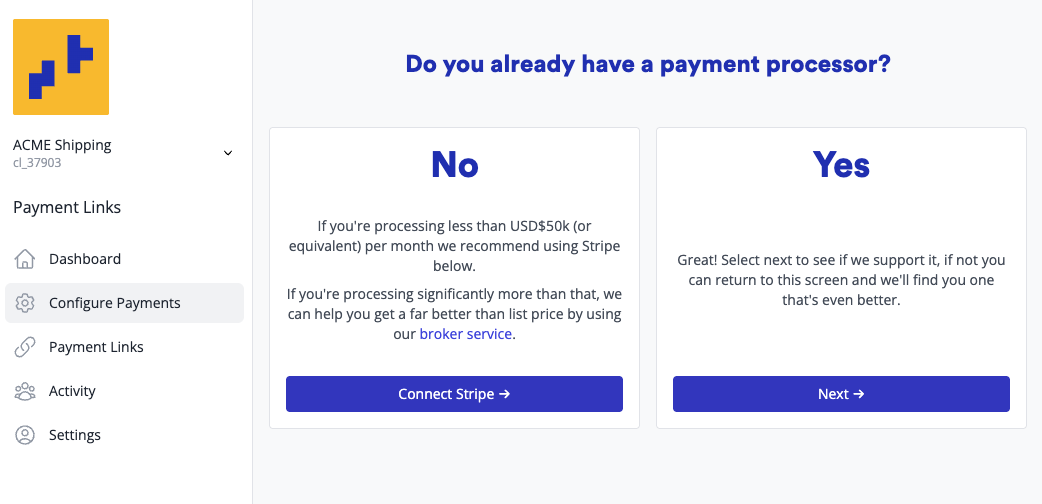
After creating a new account, you will be prompted to connect a payment processor to it ("Configure Payments" in the menu).
Shuttle supports over 30 leading payment processors, allowing you to use your existing payment processor. If you dont have one you can easily sign up with Stripe.
If you are processing over $50k / £50k / €50k / month use our free broker service to find you the best payment processor for your business. This includes ensuring it has the features you need, its competitively priced and achieves the highest possible conversion rates for your type of organisation.
Tip! A 1% improvement in conversion rate makes significantly greater difference than a 25% cheaper alternative.
In "Sandbox" we offer a "Sandbox" payment processor that allows you to test the payment link functionality without needing to connect to a third party payment processor.
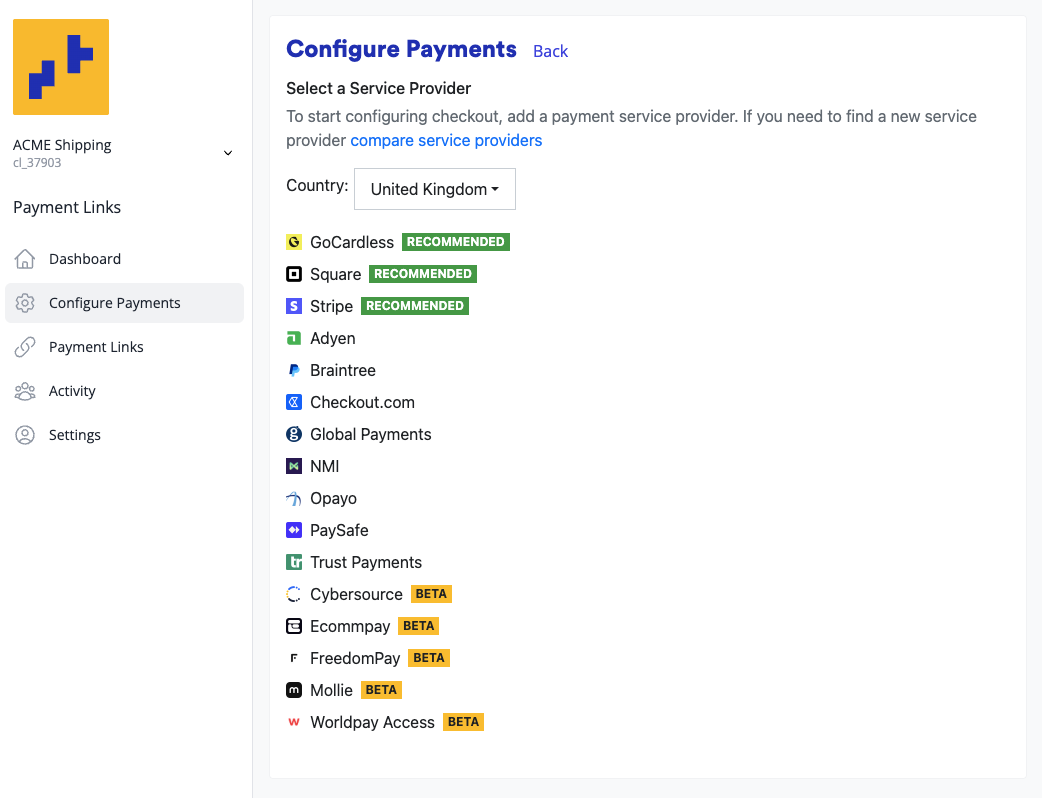
If you already have a payment processor, you can select it from the list. Please note, the list of available payment processors varies country to country.
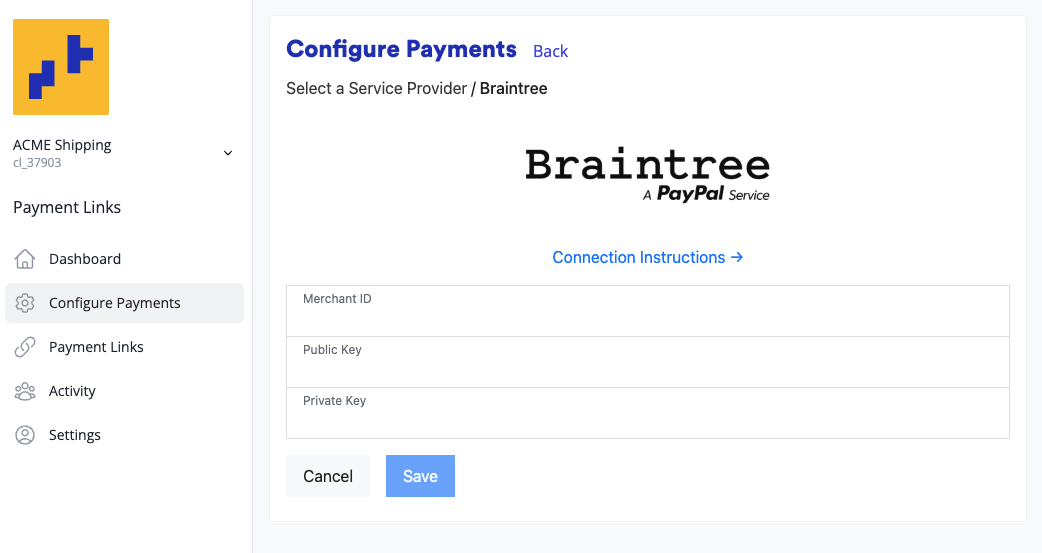
To connect a payment processor, you will either go through a login process (OAUTH flow) or be prompted to enter API Keys. Please refer to the "Connection Instructions" for a detailed guide on connecting each processor. Once connected further options may become available depending on processor, for example if you want to use address verification/
You can connect more than one payment processor to your account, and select what payment options are available at checkout. For example you could connect a card processor and PayPal.
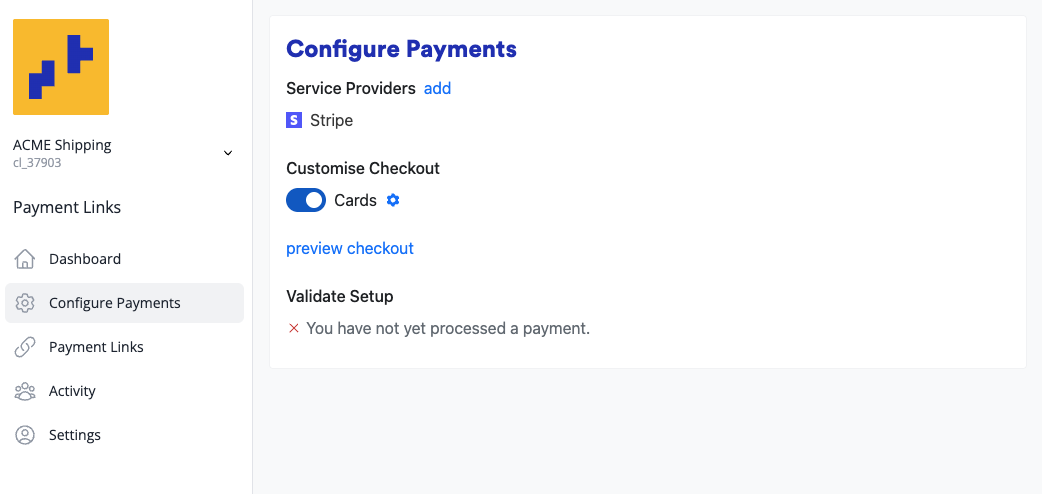
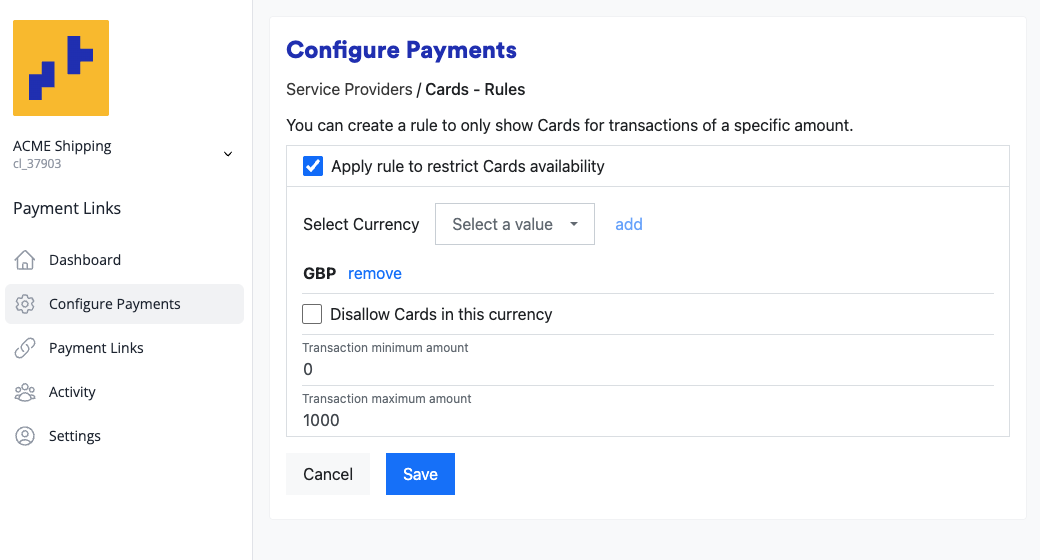
The cog by each payment method allows you to configure further rules about when that payment method is available, for example cards will not be available for payments over £1000 in the example below.
Creating a Payment Link
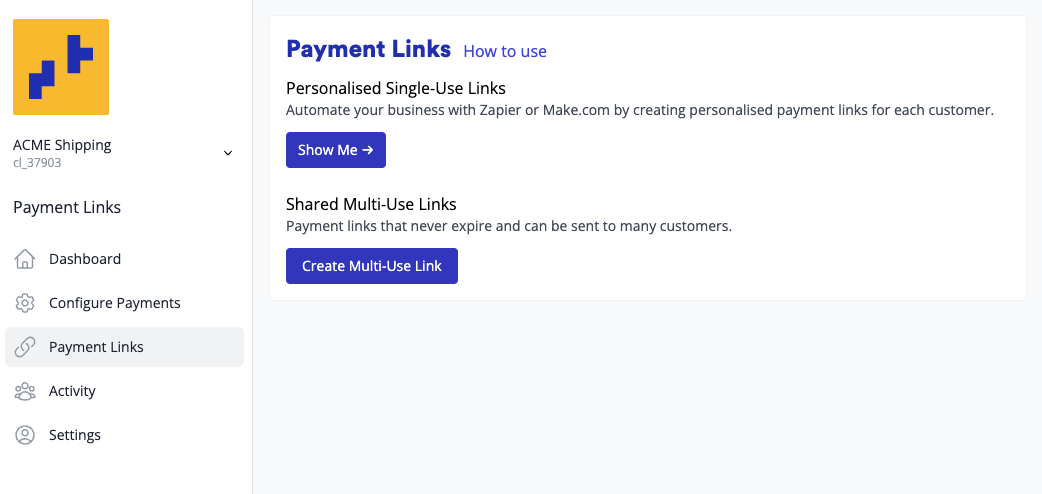
After connecting a payment processor, you You'll be taken to the payment links page where you can either configure a multi-use payment link or follow instructions on how to configure a workflow using single-use payment links.
Customising your Payment Link Page
While the content of the payment page can be configured in the payment link, the legal side of it, such as the terms and conditions, legal details, and privacy policy, can be configured under the settings tab in the menu.
You can also enable:
- Customer Receipt: Here you can also control if customers get a receipt of payment and if you get a notification of payment.
- Merchant Notification: This will email you each time a payment is made. If the payment requires some time to process, you will also be notified on completion if it was successful or not.
- Usage Reports: A summary of the week's usage will be sent every Monday. However, any errors that occurred on the account will be sent on a day-by-day basis.

Viewing Payment Activity
The "Activity" menu item lists all transaction attempts on your account. Here you can find detailed insight into the payment process and the status of each transaction, including how each payment was processed and typically the communication back and forward with the payment processor.
- Accounts: A list of customers
- Transactions: A list of transactions (both successful and failed), including both payments and refunds
- Scheduler: Some merchants may also see a "scheduler" option, this lists recurring and scheduled one-time payments
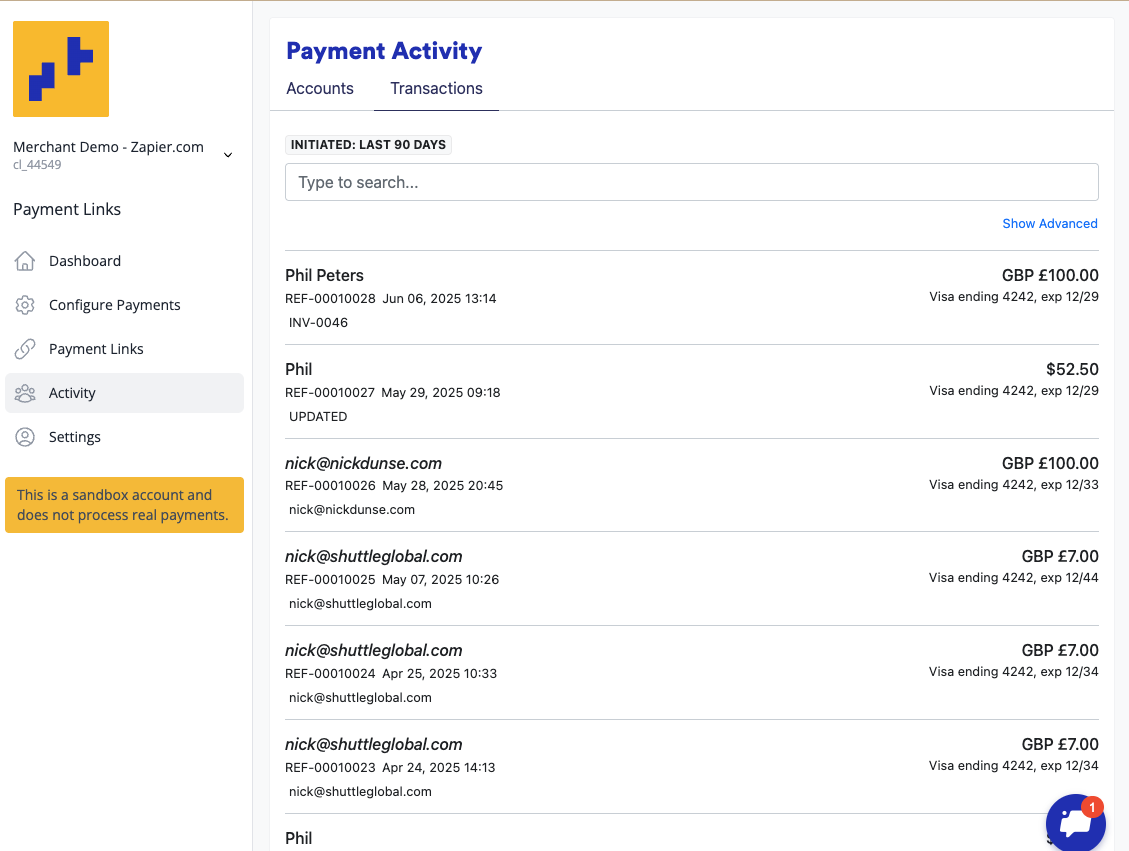
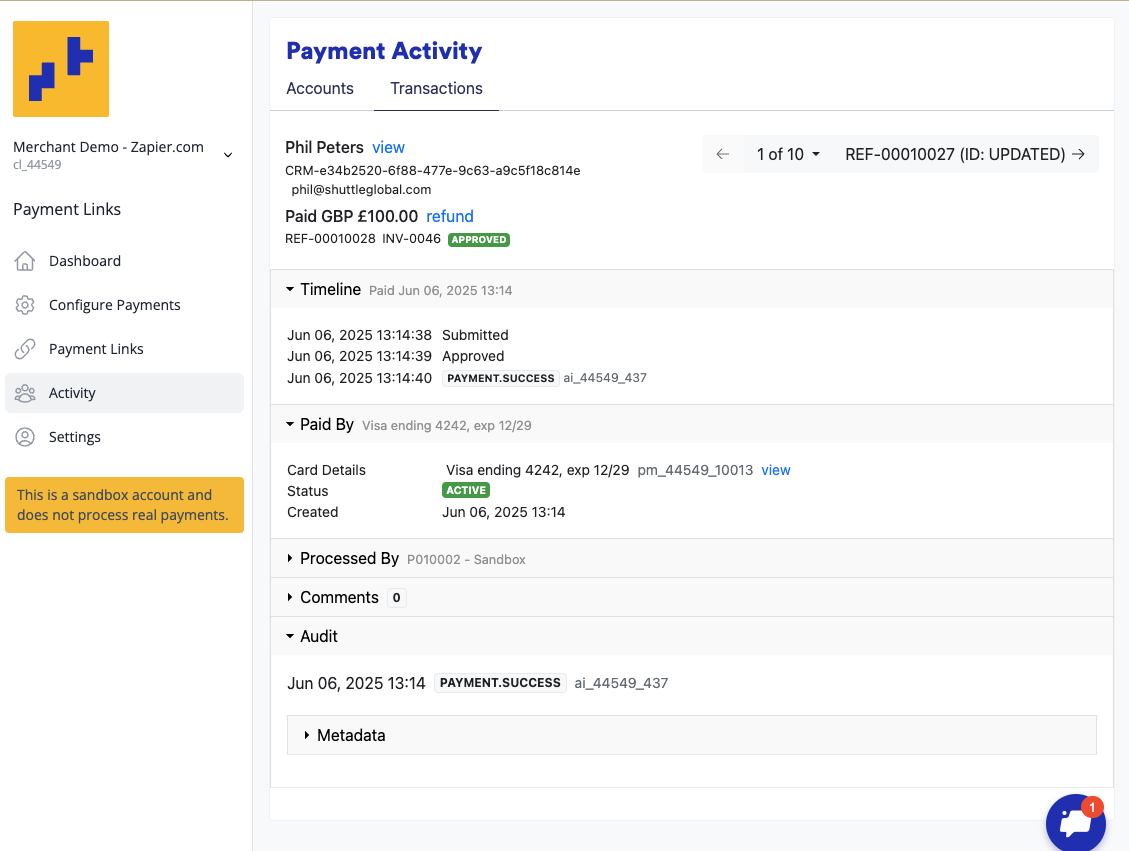
Selecting an account or transaction allows you to view the details of the payment, including the payment status, payment amount, payment method, and payment date. You can access all the raw information to do with the payment via the "Audit" tab.
Updated 8 months ago