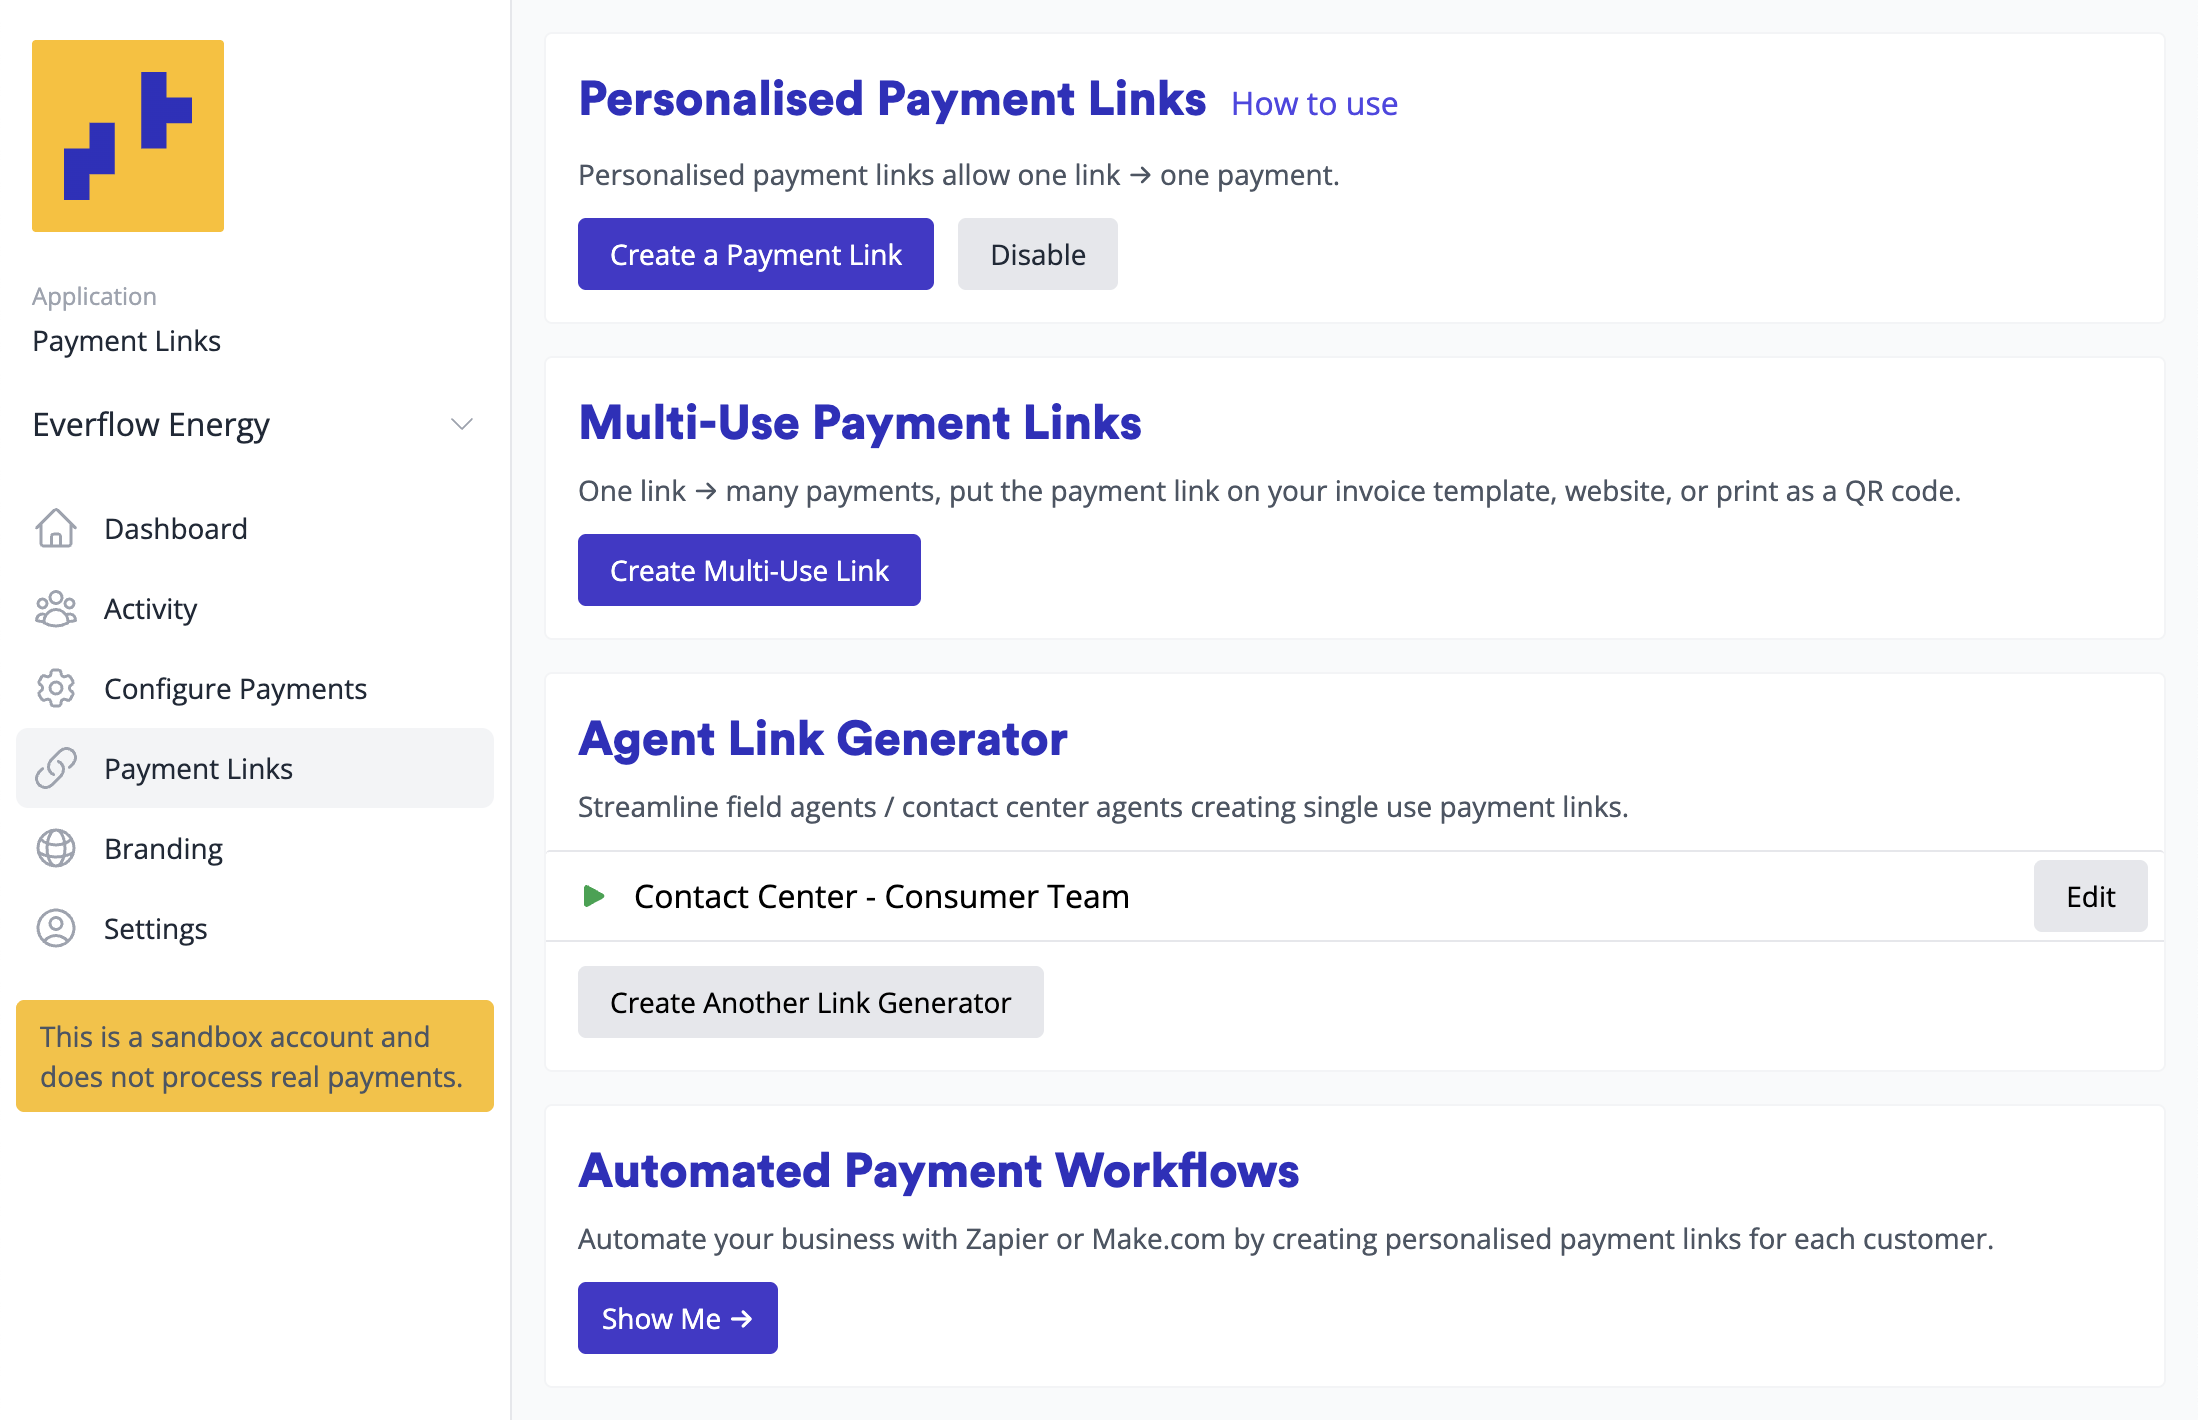
Via Agent Link Generator
The Agent Link Generator is a specialized tool designed for high-volume link creation by teams such as call centers and field agents. This customized interface is optimized for groups that need to generate massive amounts of payment links efficiently throughout their workday.
Note: This is a paid feature.
Creating a Personalized Link Generator
- Navigate to your Payment Links menu
- Select "Agent Link Generator"
- Click "Create new link generator"

Generator Configuration
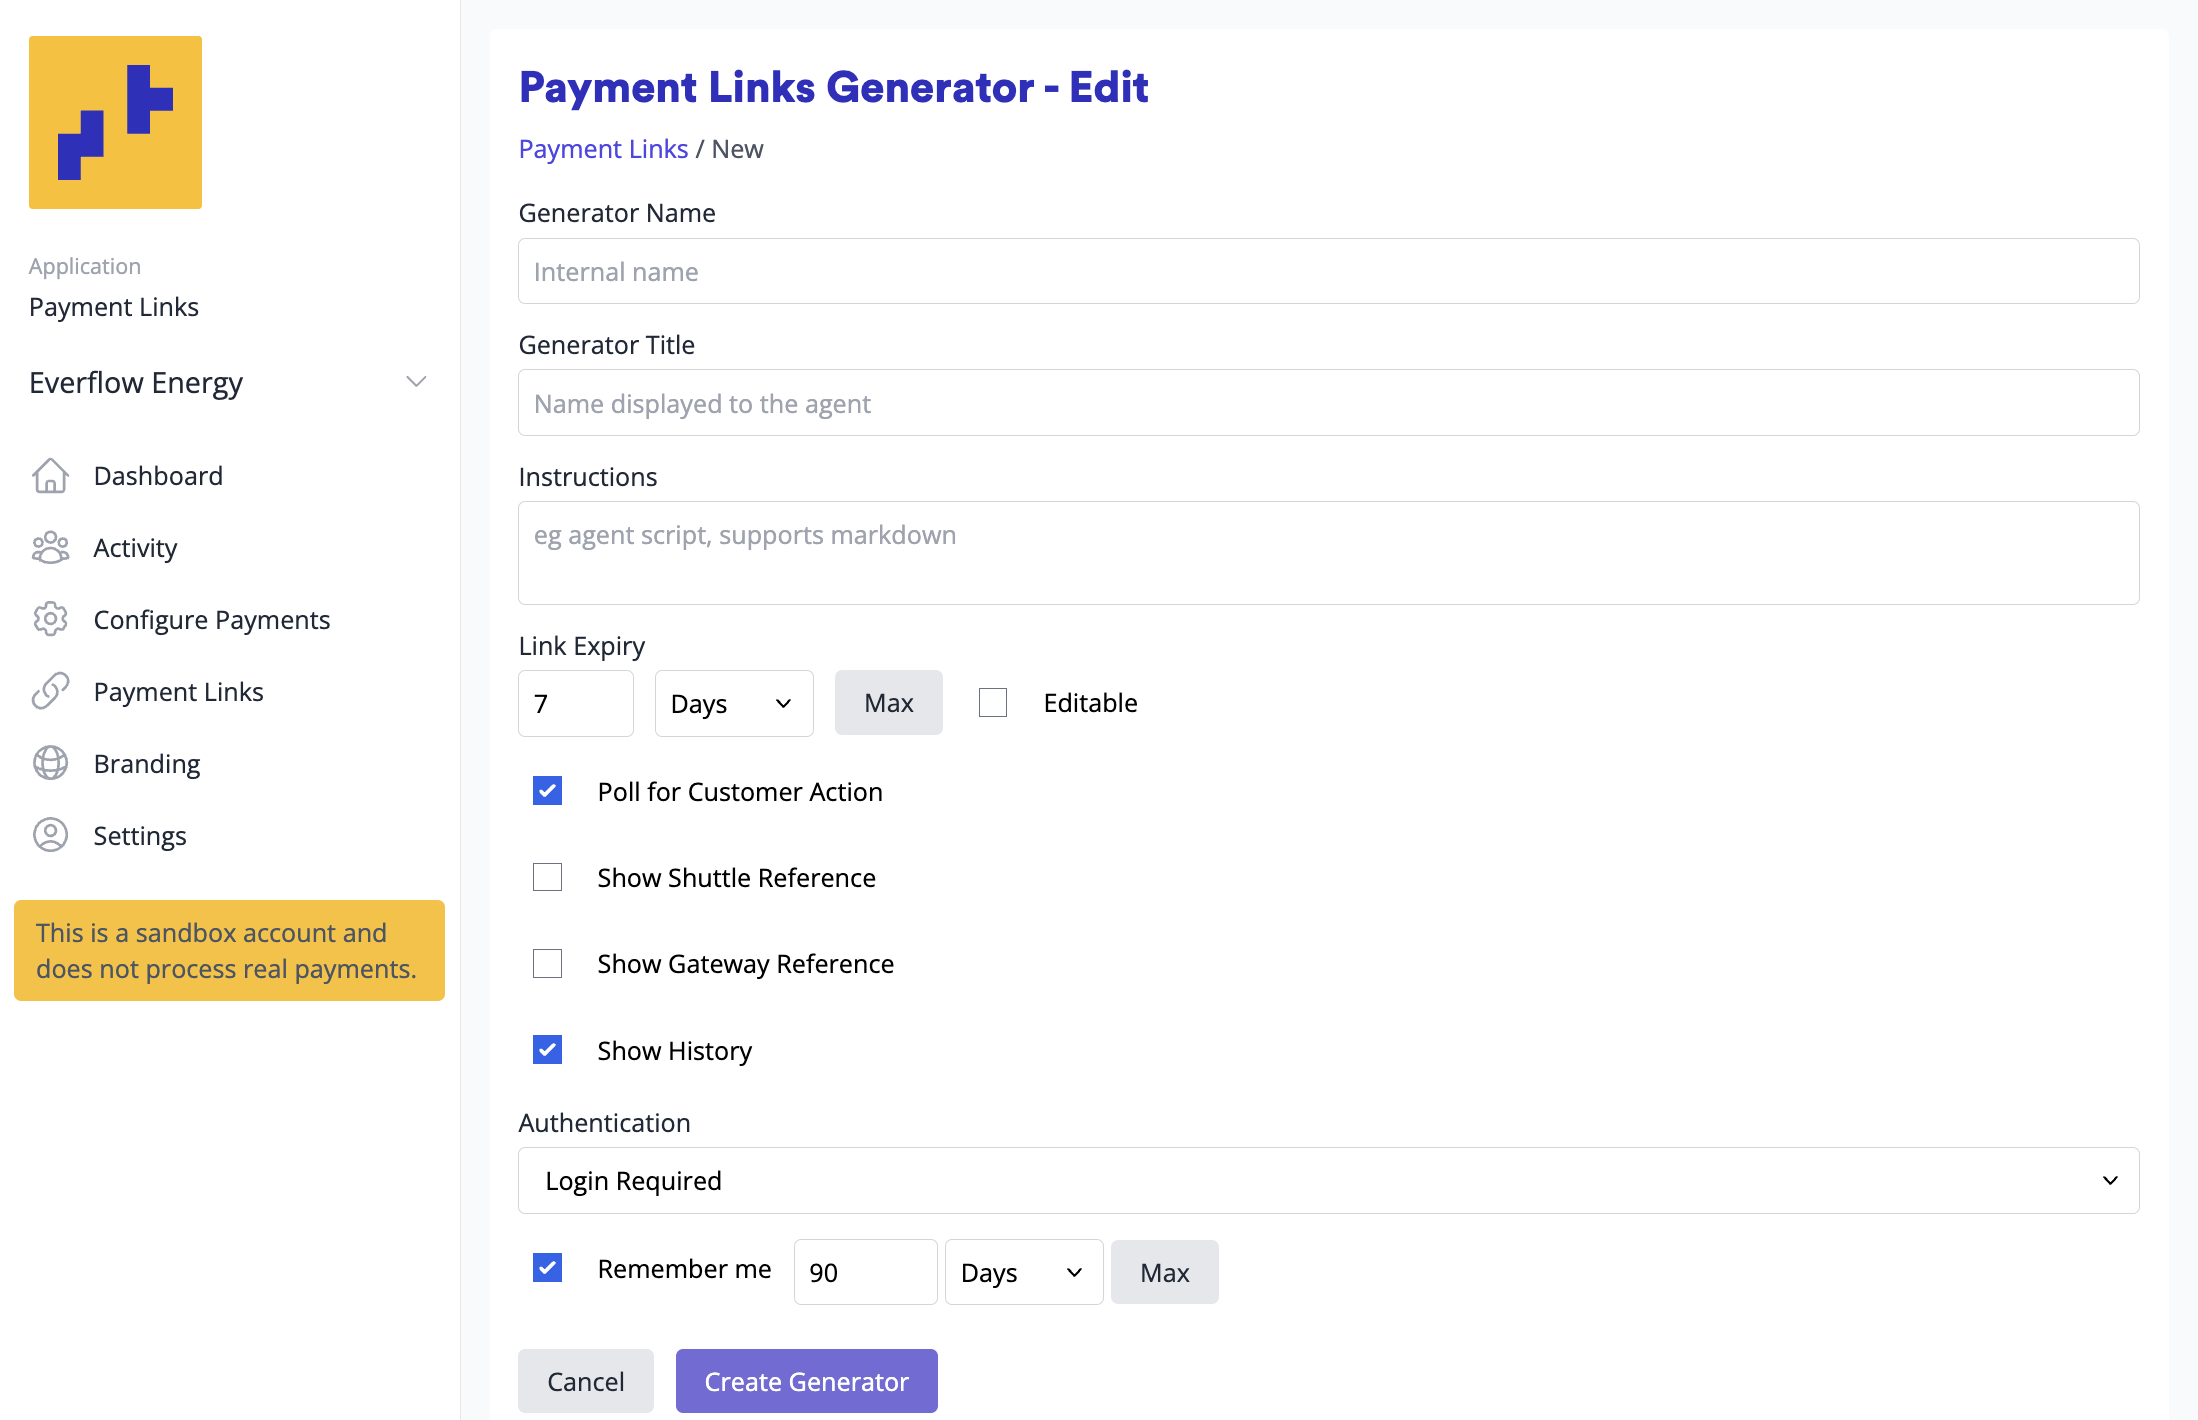
When creating a new link generator, you'll configure the following settings:
- Generator Name - Your internal name for this generator
- Generator Title - The name displayed to staff members at the top of the link generator interface
- Instructions - Agent guidance that supports Markdown formatting (useful for scripts, pre/post-task instructions)
- Link Expiry - Set expiration up to 90 days, configurable in minutes or days
- Editable Flag - Controls whether agents can override the link expiry. If unticked, links expire as per the configuration. If ticked, agents can modify the expiration (e.g., field agents offering quotes can say "this quote expires at 5pm today")
- Poll for Customer Action - Shows "Waiting for customer" spinner and tracks customer progress
- Show Shuttle Reference - Displays Shuttle's internal payment ID on successful transactions
- Show Gateway Reference - Displays the payment processor's ID (Stripe, Adyen, etc.) for integration with other systems
- Show History - Provides access to recently created links via a history option
- Login Required - Default authentication method
- Session Duration - Control how long users stay logged in on a browser (configurable in minutes or days)

Once you've created a payment link generator, you can either use it immediately or press "Edit" to further customize it.
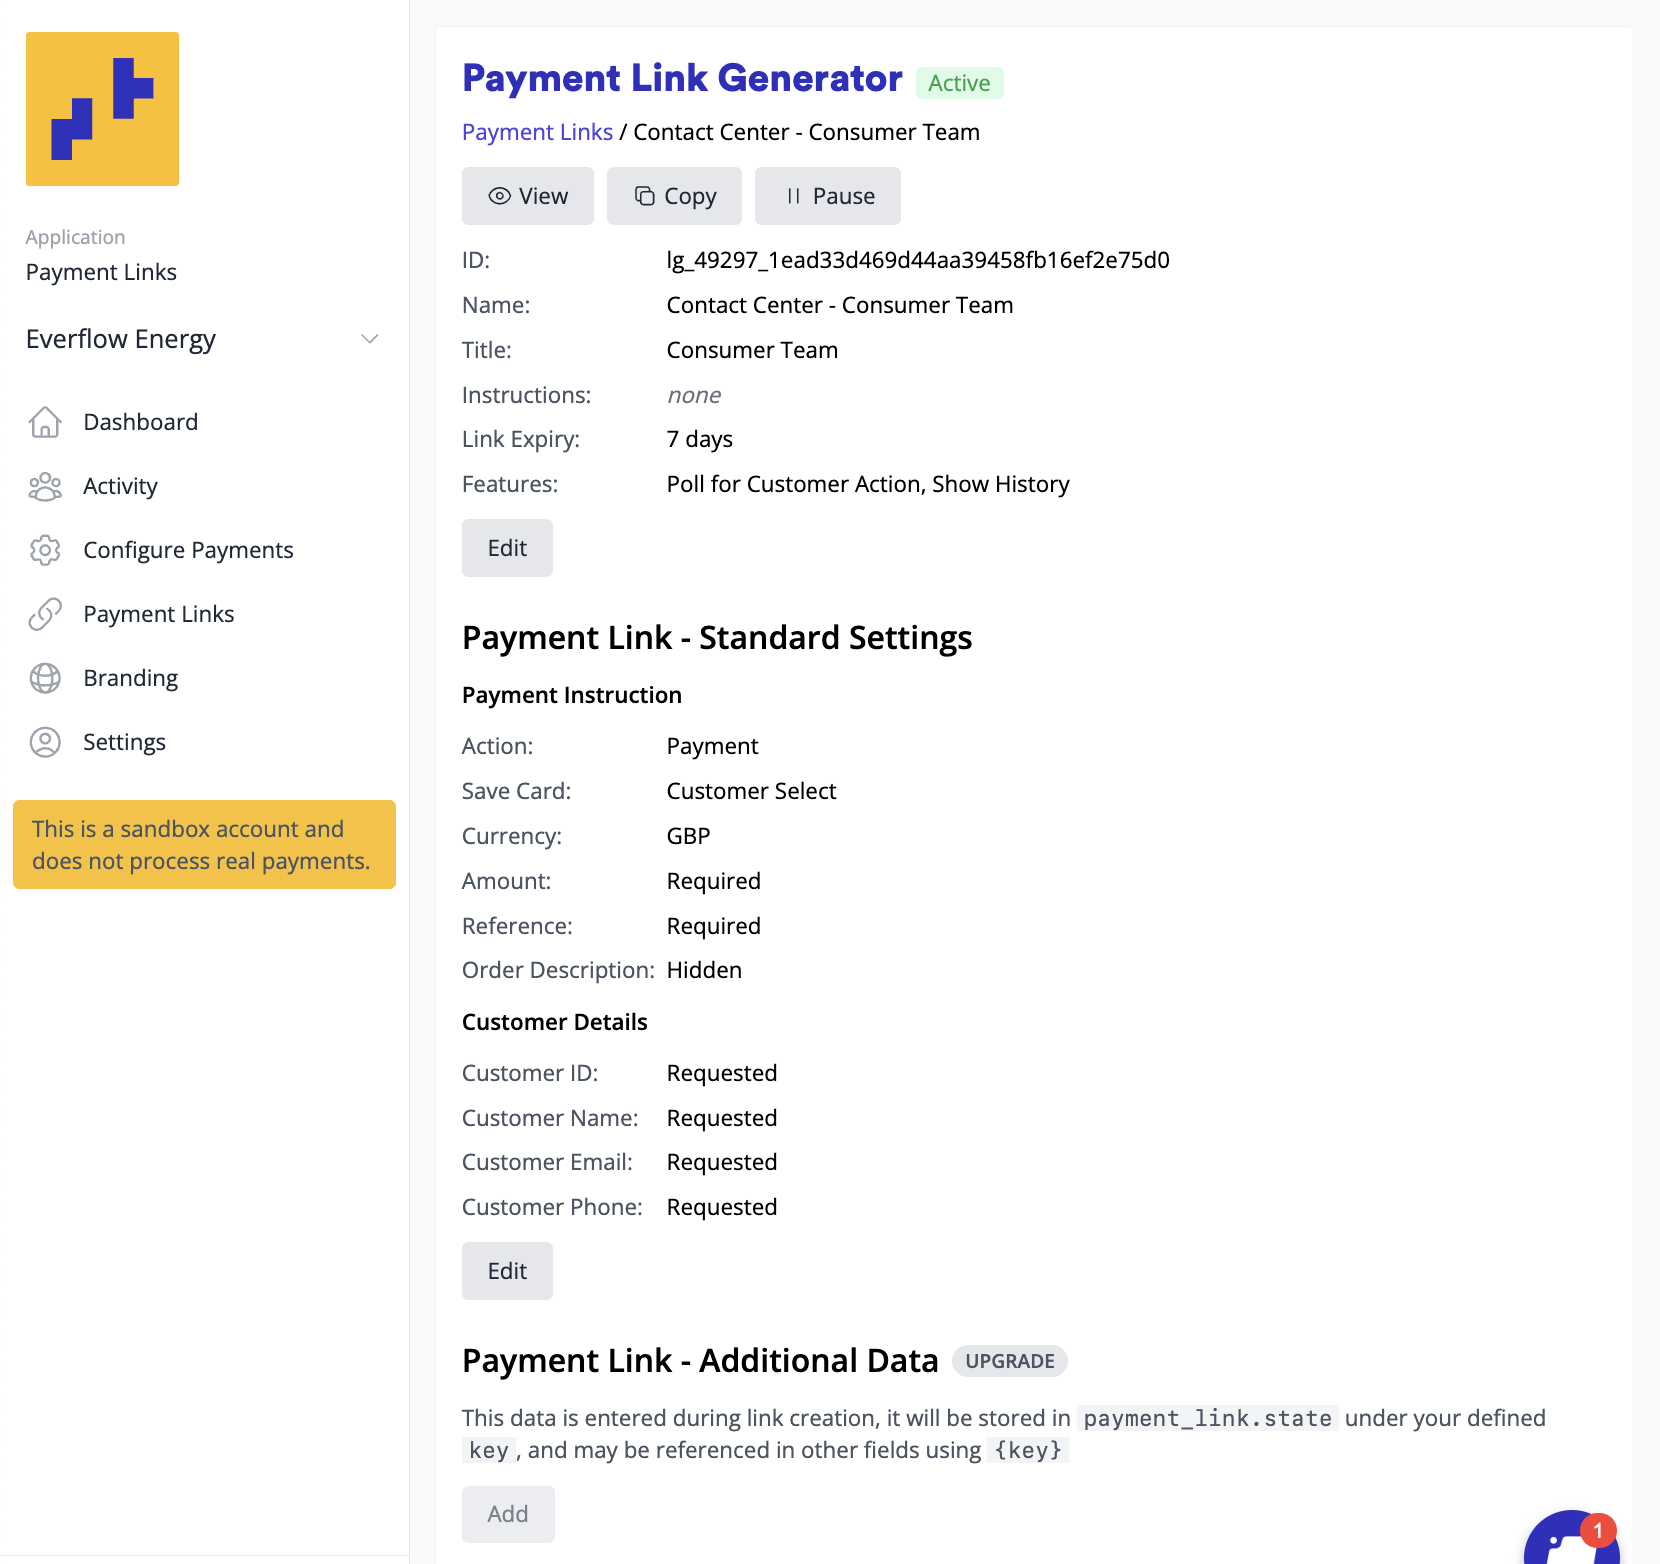
The Agent Generator view provides the following options:
- View - Use the Link Generator immediately
- Copy - Copy the URL to clipboard for bookmarking or sharing
- Pause - Temporarily disable the generator while preserving its URL
- Once paused, you can Resume to reactivate it
- Or Delete to permanently remove it (irreversible action)

The edit screen contains three sections:
- Basic Settings - The configuration settings described above
- Payment Link Standard Settings - Customize the payment link fields
- Payment Link Additional Data - Premium feature available on enterprise plans with Shuttle agreement
Payment Link Standard Settings
This section allows you to customize which fields appear in your link generator. Most fields can be configured as:
- Hidden - Field doesn't appear to the user
- Fixed - Predetermined value that's the same for every user
- Optional - User can enter but isn't required
- Required - User must enter as a mandatory field
Available Fields
- Link Title - The heading displayed to customers. Defaults to your merchant name but can be customized.
- Personalized Entry - A personalized message to the payer.
- Action - Choose between: Payment (standard transaction), Auth (blocks funds without transacting - requires manual capture via Activity View), or Tokenized (captures payment method only without any payment)
- Currency - Payment currency selection.
- Amount - Payment amount.
- Reference - Transactional reference field.
- Order Description (optional) - Allows customers to add comments (e.g., color, size preferences). You can provide instructions in the Personalized Entry field.
- Save Card - Control card saving behavior: User selects (customer chooses), Always save, or Never save
- Customer ID - Customer identifier field
- Customer Name - Customer name field
- Customer Email - Customer email address field
- Customer Phone - Customer phone number field
- Skip Receipt - Bypass receipt page and redirect directly to success/pending URLs
- Success Message (optional) - Message displayed on receipt page after successful payment (e.g., access codes, next steps)
- Pending Message (optional) - Message shown when transaction is still processing. Use to advise against provisioning services until payment confirmation
- Success URL - Redirect destination after successful payment
- Pending URL - Redirect destination when payment is submitted but not yet fully authorized
Payment Link Additional Data
The Payment Link Additional Data feature allows you to add custom questions that get stored in the payment link's state. This data can be accessed in three ways:
- Programmatically - Via API access
- Automation Software - Through integrations like Zapier or Make.com
- Field Population - Use collected data to fill other fields automatically
For example, you might ask customers for their booking reference and automatically populate it into the transaction reference field.
Adding Custom Data
You can add information in two ways:
Request Information - Prompt users to enter data:
- Configure a field name (what the user sees)
- Set a key for storage in the state
- For Zapier/Make integrations, use keys state0-state9
Hardcode Information - Set fixed values:
- Define a key for the data
- Set the value to be stored
- Example: Set
state0 = "DEBT_WORKFLOW"so your Zapier workflow can easily identify relevant transactions

Referencing Data in Fields
Use the syntax {{key}} to reference additional data in any payment link generator field:
- Single Reference:
{{state1}}(if state1 contains booking reference) - Combined with Text:
"Your booking {{state1}}" - Multiple references:
"Order {{state1}} for {{state2}}"
This allows dynamic content based on the data collected or hardcoded in your additional data configuration.
Updated 5 months ago