Onboarding
The onboarding component allows merchants to connect and configure their preferred payment processor and configure what payment options are available at checkout. It is delivered as an iFrame designed to exist within the platform's admin portal for the merchant, eg under a "Configure Payments" menu option.
Integration Style
Shuttle offers two distinct integration styles to accommodate different platforms looking for a full-stack payment solution (Powered by Shuttle) vs platforms looking to simply add additional payment processors via an app store type interface on their platform (Enhanced by Shuttle). To use Shuttle in the app store mode, pass the processor parameter to the onboarding component.
Powered by Shuttle
Using Shuttle as a full stack payment solution is the most powerful, allowing you to connect multiple different payment processes and compose them into a holistic checkout.
Enhanced by Shuttle
Using Shuttle within an app store model is possible (ie the merchant selects which payment processor they wish to use outside of Shuttle in some form of integration app store). In this scenario, you will have one payment processor per instance and composing multiple payment processes into a checkout becomes the responsibility of the software platform. This option is designed for platforms maintaining legacy integrations.
Tip! You can convert an app store model into a full stack payment solution through the omission of the processor parameter, however you cannot convert it back again unless no additional payment processors have been added (even if now archived)
Features
-
Legal T&Cs
- Shuttle encapsulates payment providers' T&Cs within its own
- Platforms can use Shuttle's T&Cs or incorporate them into their own
-
Payment Processor Configuration
- 30+ payment processors available via OAuth or API key
- Processor-specific settings (AVS, 3D Secure, etc.)
-
Fraud Tool Integration
- Support for third party fraud prevention with easy enablement
-
Checkout Customization
- Toggle payment methods on/off, and which processor to use
- Configure advanced rules (e.g., limit payment methods by transaction amount)
-
Preview & Styling
- Live checkout preview with transaction status indicators
- Non-opinionated design with basic CSS customization (fonts, spacing, colors)
UX Design
Positioning Within Your App
The onboarding component is designed to be presented within your merchant admin screens, inline as such
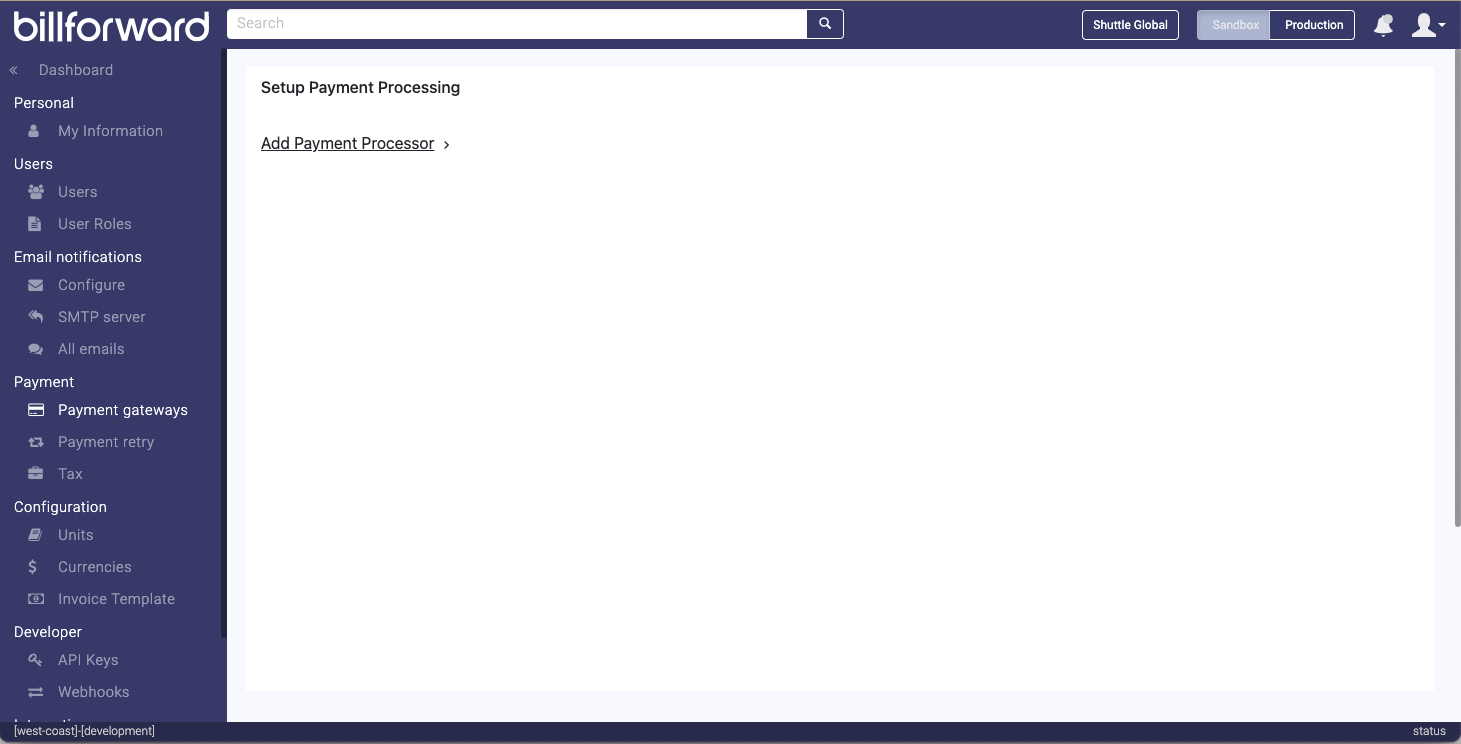
You can adjust key CSS elements such as font, text-size and colors to make it feel more natural within your app.
While we've tried to make the UX feel natural in any environment, if it is too different, we suggest presenting it in a modal dialog, such as:
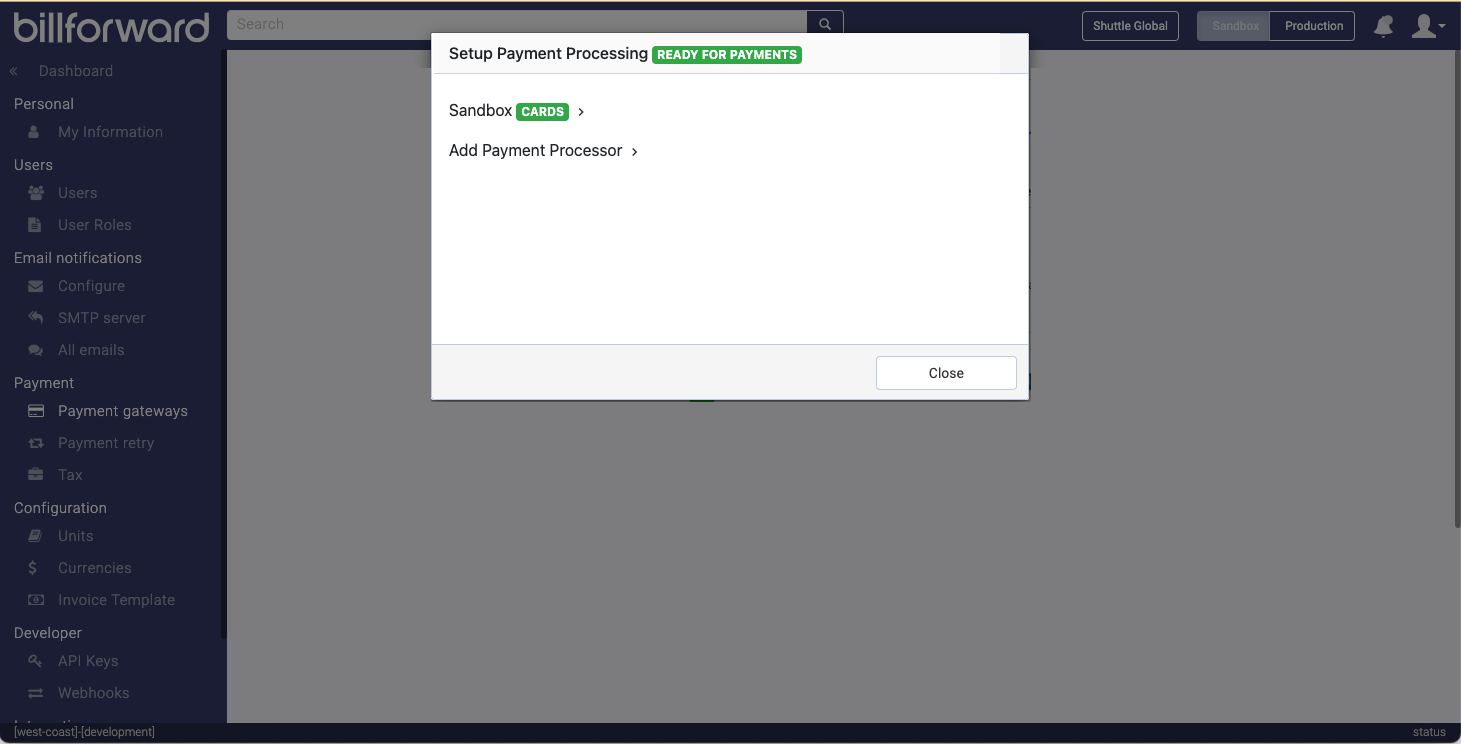
A Javascript message of type SETUP_DISPLAY will be raised every page render with the vertical height of the component so you can adjust your page if required, this also includes a modal flag to indicate if a modal dialog is being presented should you want to obscure your page.
Legal T&Cs
Shuttle have developed a set of terms and conditions that covers Shuttle's requirements along with any additional terms and conditions required by payment processors.
You have the option of incorporating these into your own terms and conditions, or you can let us handle this, and we will prompt the user to agree to them on first use.

Full Stack Configuration Screen
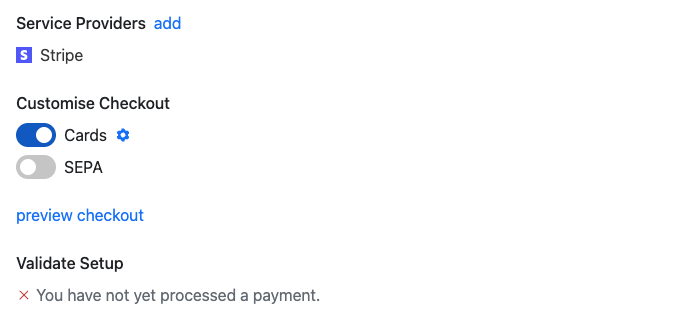
The full stack configuration screen allows the merchant to configure any number of payment processors and determine what options are available at checkout. As saved payment methods are stored with the payment processor, it is also common place to see multiple payment processors in the configuration screen, whilst any cards saved with legacy processors are run-down.
Connecting a Processor / Fraud Tool
When multiple payment processors are enable, the user will be prompted to select one, a country selector helps the merchant select one that onboards merchants in their country. The country selector will only display countries supported via the enabled processors.
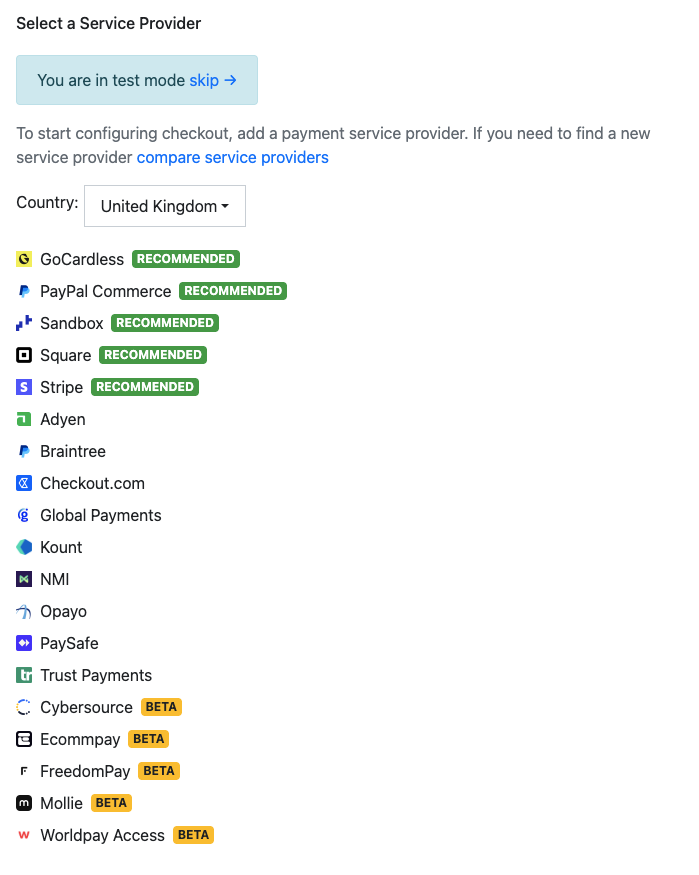
Some processors require an OAUTH (login) process, whereas other require API keys. For those requiring an OAUTH login process, the login will be opened in a popup as such:
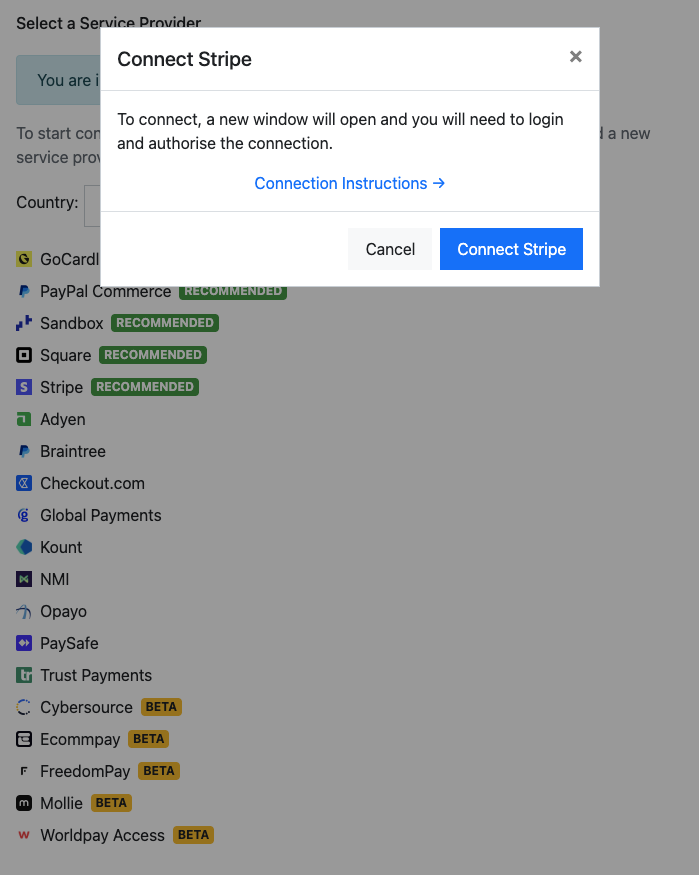
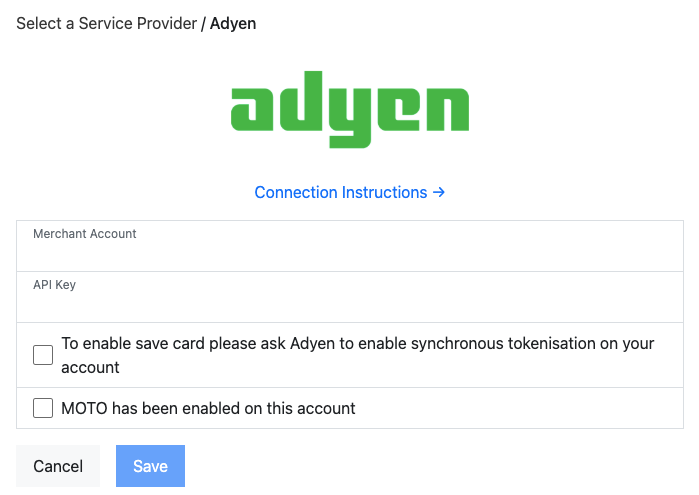
For those requiring API keys, these will be requested inline. Each gateway has "Connection Instructions" that contained detailed instructions on how to gather any fields required.
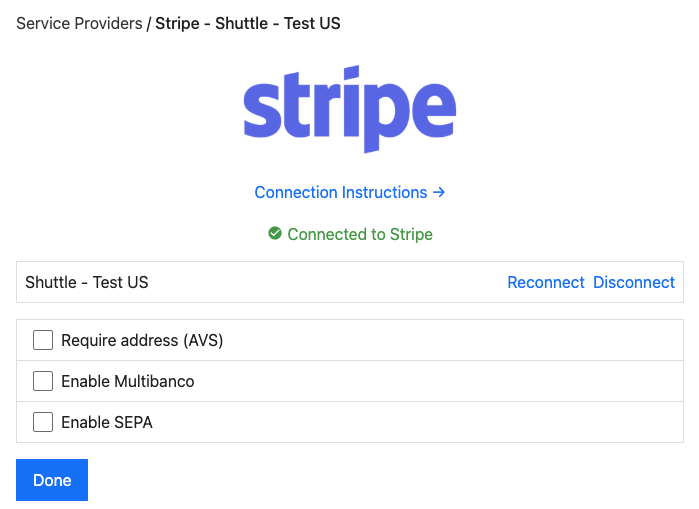
Once you've connected a payment processor the user will see the edit page, here they can control any configuration as well as disconnect the payment processor. Different payment processors have different options:
Customising Checkout
A merchant can connect multiple payment processors to cater for the following scenarios:
- When switching payment processors, they can connect a new payment processor, and direct new transactions to that, while retaining the old connection for saved cards and for refunding old transactions.
- To run different payment methods into different payment processors, eg Stripe + Paypal
When the merchant connects multiple processors, the screen will display the list of supported payment methods and which processor will be used for it. A payment processor with no payment methods directed to it can still be used if a card has been saved to it. The number of saved cards its holding is displayed on the connection edit screen.

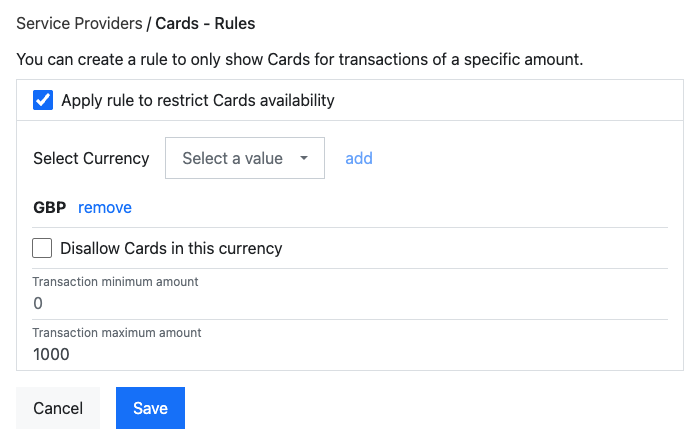
The merchant can also set rules for which payment methods are available at checkout. They can:
- Disable a payment method for a certain currency
- Disable a payment method based on transaction amount (eg disallow cards above $1000)
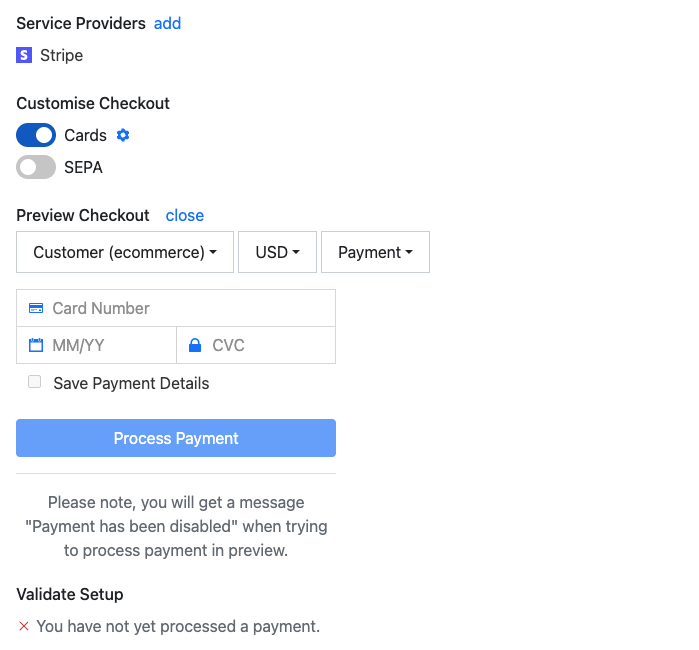
Previewing Checkout
The merchant can preview the checkout experience, this will display the checkout with the payment methods enabled and configured.
Tip! a transaction amount of "10" is used in the preview, so will not show options that are disabled for that amount.
App Store Mode
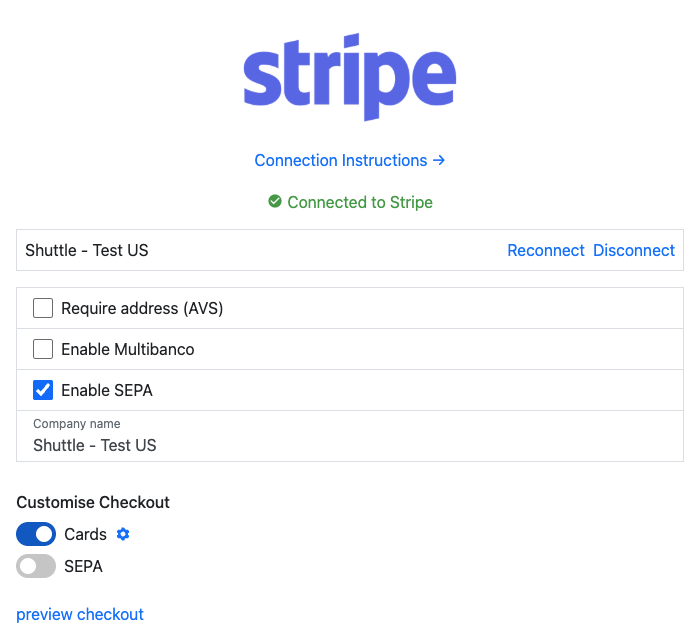
When you pass the processor parameter to the onboarding component (eg `"processor": "STRIPE"), you will be presented with a single processor configuration screen, this is the app store mode.
In this mode, the user will be prompted to connect a payment processor, and then be able to configure it. This is the mode you would use if you are looking to add a payment processor to your platform via an app store interface.
Customizations
The onboarding component can be customized in the following ways.
- Country: The country of the merchant is determined from the IP address you pass into the deep_link creation, you can override this by setting
deep_link.context.countryusing the 2 letter iso code eg US / GB. - Processors Filter: You can filter the available processors by setting
deep_link.context.processor_filterto a CSV of processor IDs egSTRIPE,PAYPALC. Note, in general you should configure available processors on your application, or passprocessorfor an individual processor - Onboarding Terms and Conditions: You can disable Shuttle's T&Cs by deselecting "Onboarding Terms and Conditions" in the "Configure onboarding" section in the dev portal. Please note your legal obligation to incorporate T&Cs into your own T&Cs by selecting this
- Hide Marketplace: You can hide the marketplace link by selecting "Hide Marketplace" in the "Configure onboarding" section in the dev portal. This will remove the link to Shuttle's merchant portal - note you must leave this enabled if we have a revenue share agreement.
- Hide Customise Checkout: You can hide the "customise checkout" section by selecting "Hide Customise Checkout" in the "Configure onboarding" section in the dev portal.
- Hide Preview Checkout: You can hide the preview checkout section by selecting "Hide Preview Checkout" in the "Configure onboarding" section in the dev portal.
- Styling: You can customise the basic styling of the onboarding component by setting
deep_link.context.theme(see Styling)
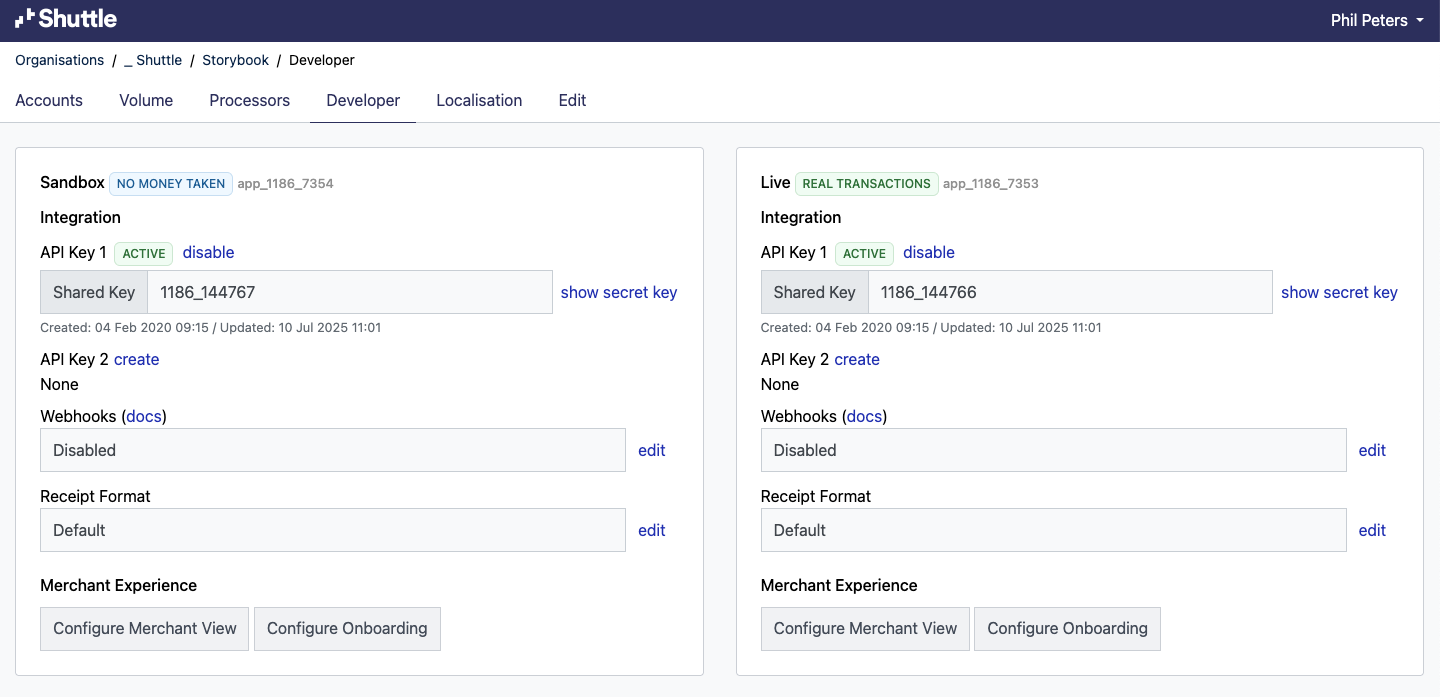
To access the "Configure onboarding" section, you will need to use Shuttle's developer portal as an admin, and select "Configure Onboarding" on the application's Developer tab, note "Sandbox" is controlled independantly of "Live"

Updated 4 months ago